Getting started with your TeamViewer ONE Standard or Advanced license is the first step toward unlocking the full potential of your endpoint management solution. Designed to go beyond traditional remote support, TeamViewer ONE empowers you to manage, monitor, and support your devices efficiently and securely. In this article, we’ll guide you through the activation process step-by-step, so you can get started quickly and confidently.
This article applies to all TeamViewer ONE license holders.
How to get started with your TeamViewer ONE license
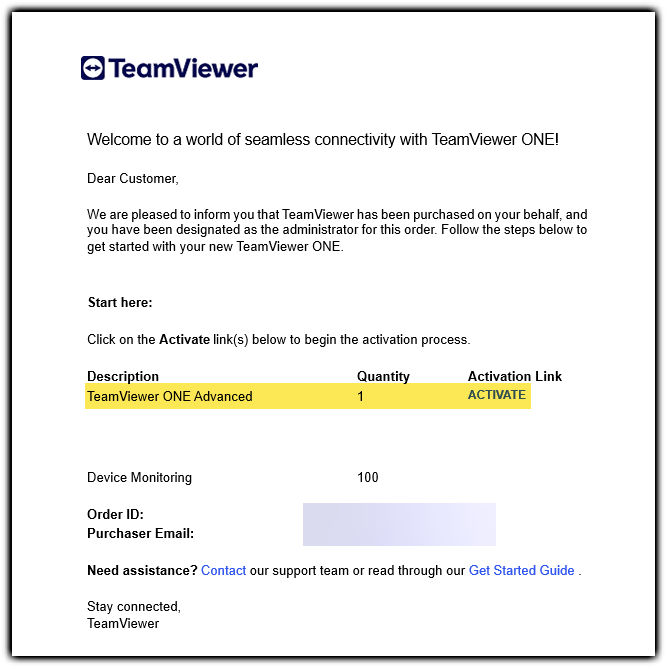
To activate your TeamViewer ONE license, please follow the instructions below:
Step 2: Sign in with your admin account or create a TeamViewer account and activate the license
- I already have a TeamViewer account
- I don't have a TeamViewer account
- Sign in with your existing TeamViewer account.
- Click Activate.
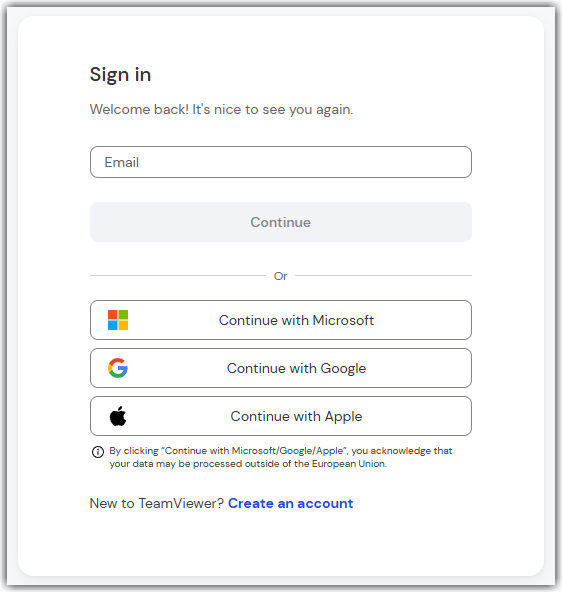
- Click Create an account.
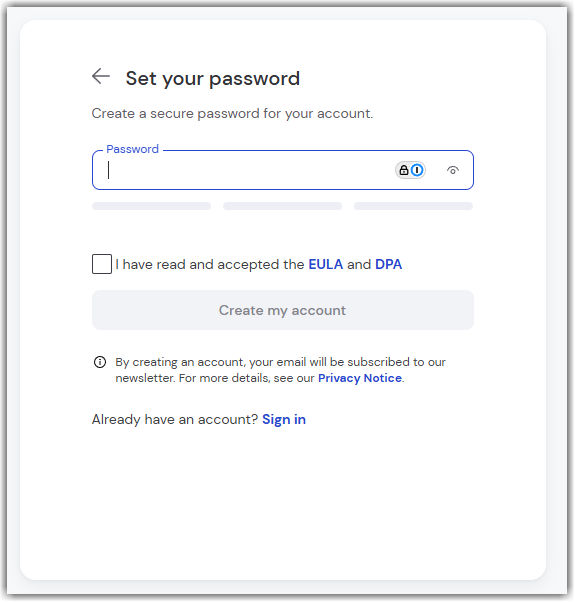
- Enter your name and email address, and click Continue.
- Create a password, read and accept the EULA, mark the captcha box, and click Create my account.
4. You'll be informed that an email has been sent to your inbox for account verification. Click the Verify account button in the email to verify your account. A page will open confirming the account validation. You can now close the window.

5. Upon completion, go back to the initial browser window, tick the box for I have verified my account, and click Sign in. Enter the password you just created and click Sign in.
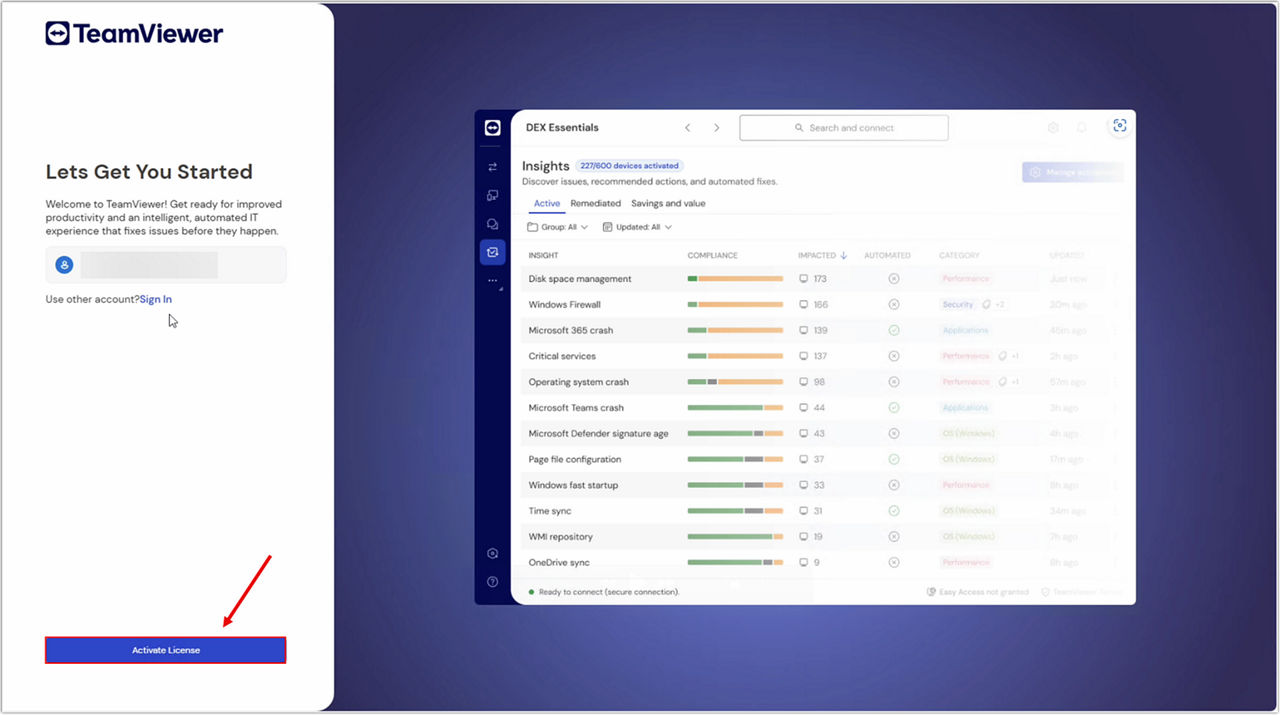
Step 3: Click the activate button
An activation page will appear. Click Activate license.
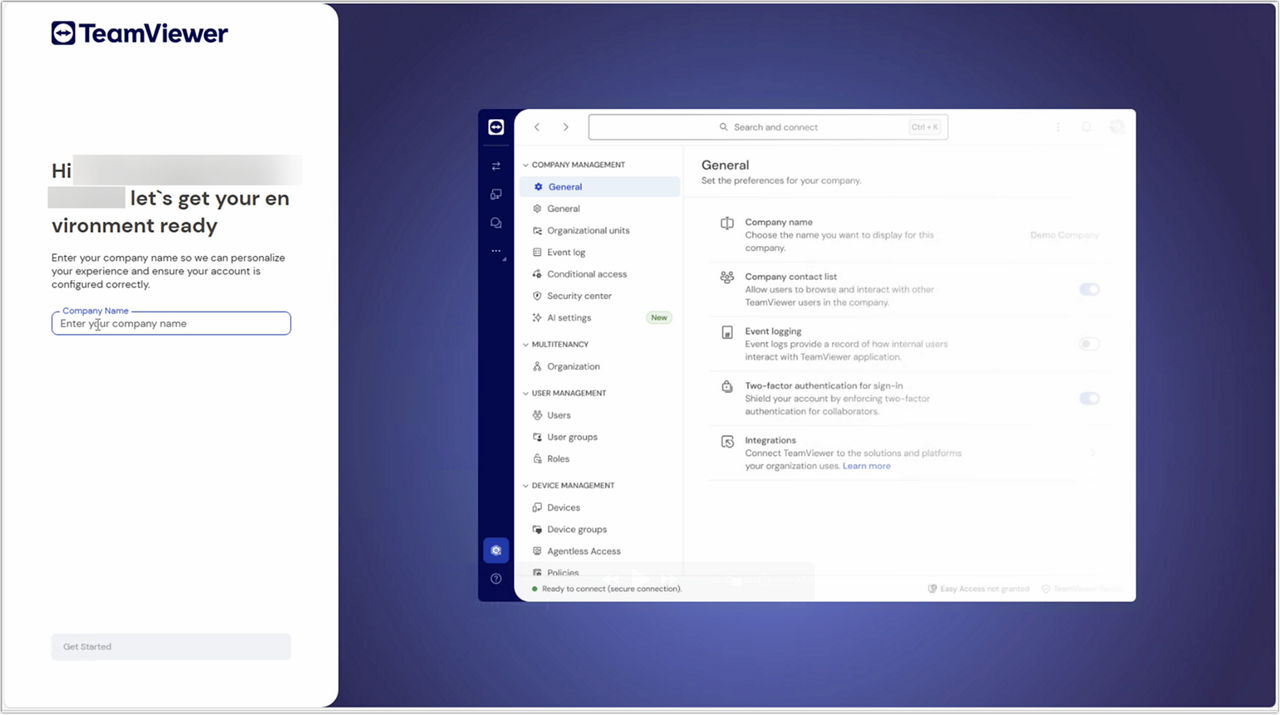
Step 4: Create your company
Now, enter your company name, and click Get started.
Step 5: Complete the setup
You are now invited to go through our TeamViewer ONE onboarding. Click Continue.
After completing the onboarding process, the system will load TeamViewer DEX Essentials services. This may take up to five minutes. Once the setup is finished, you’ll receive a notification confirming completion.

For more information on TeamViewer DEX Essentials, please see the article below:
Step 6: Assign the license to your users
- For new users
- For existing users
For more information on how to set up TeamViewer DEX Essentials, please see the article below:
For users who do not have a TeamViewer account, please create a TeamViewer account for them by following the instructions in this article: Add users to your company
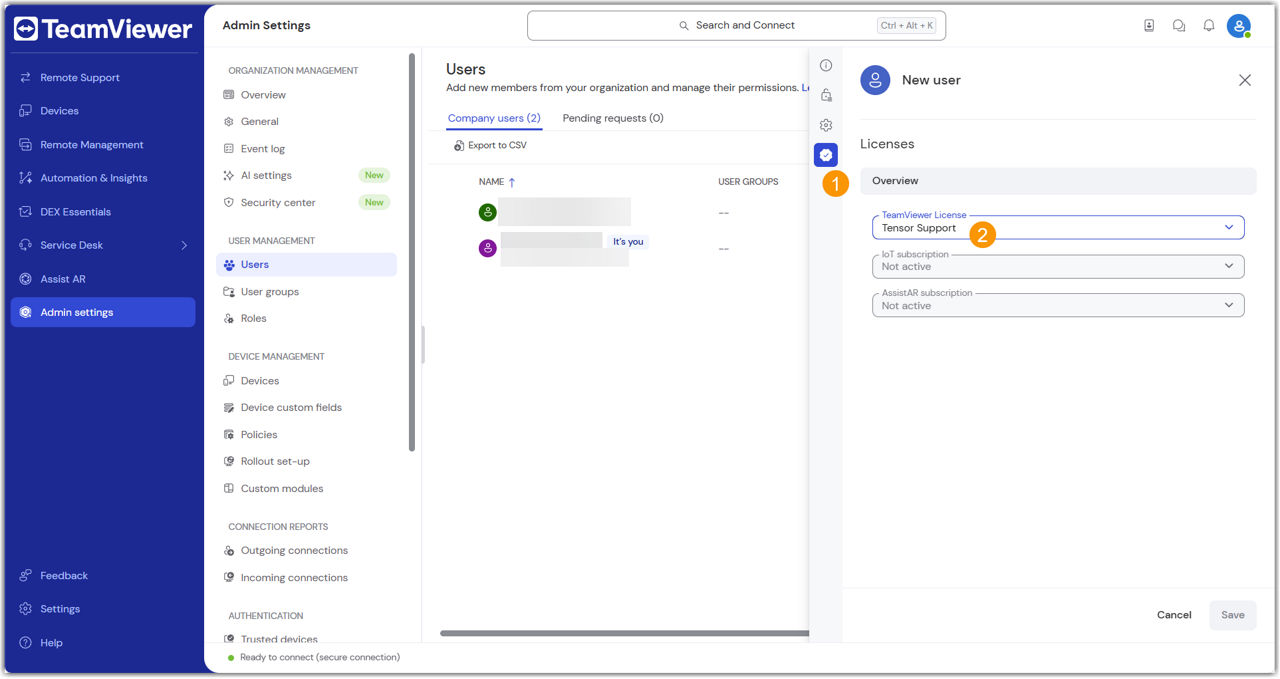
During the user creation process, you can directly assign the license to the user via the Licenses tab, as shown below:
For users who already have an existing account, you can add them to your company by following the second chapter of the article here: Add existing users to your company
Once the users have been added, you can assign them the license as follows:
- Select the user(s).
- Click Edit.
- Click Edit user information.
- Go to the Licenses tab.
- Within the TeamViewer license section, select the desired license.
- Click Save.
You have successfully activated your TeamViewer ONE license.
For more information on how to set up your TeamViewer environment, please see the article below: